Using a Flex/FlexMax as a Slave
Note that this is the old way to add slaves to a show. Director now handles slaves automatically when you add a Flex or FlexMax to a show. Inputs on the slaves can also be used in the Master show. The only reason to use this article would be if you want the slave to play audio along with the master.
Need more outputs? Learn how to slave additional Flexes or FlexMaxes to your show by setting them into Slave Mode. This allows you to program all the animation in a single show and have it all stored on the master controller.
Traditionally this was done by either triggering both controllers at the same time, or by triggering the second one using the output of the master. This wastes one output per scene and also means you have to program both shows separately which is a pain.
Create the Master Show
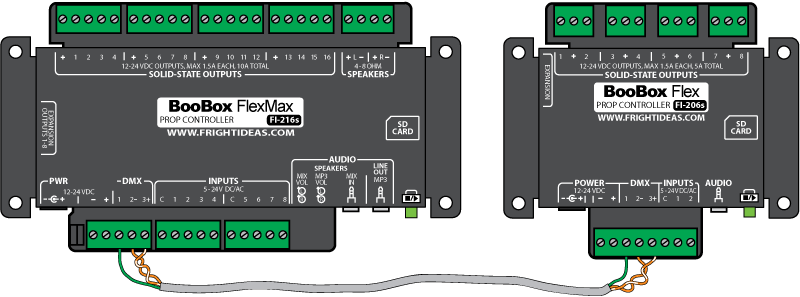
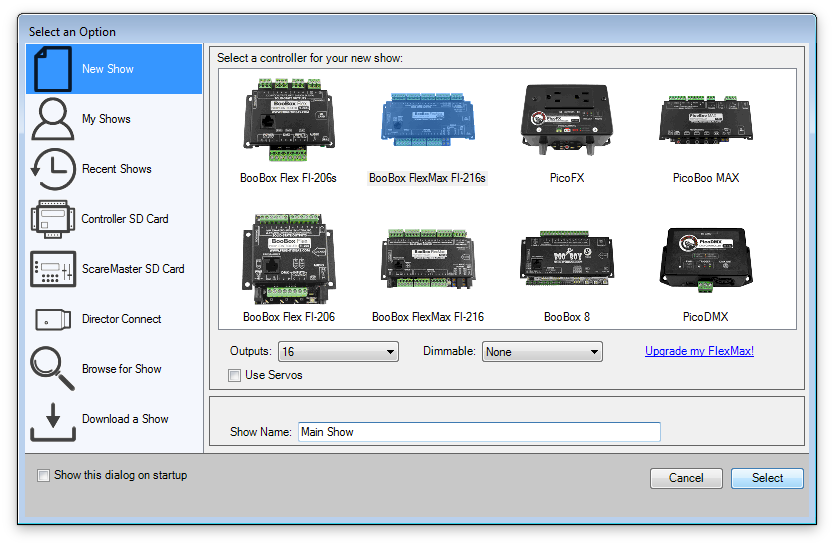
You can use a FlexMax or Flex with DMX Output as the master controller. If you haven't already done so create your main show. In the example below we're using a FlexMax 216s.
Add the Slave
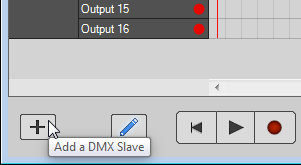
Click the Add button in the bottom left corner to add the slave.
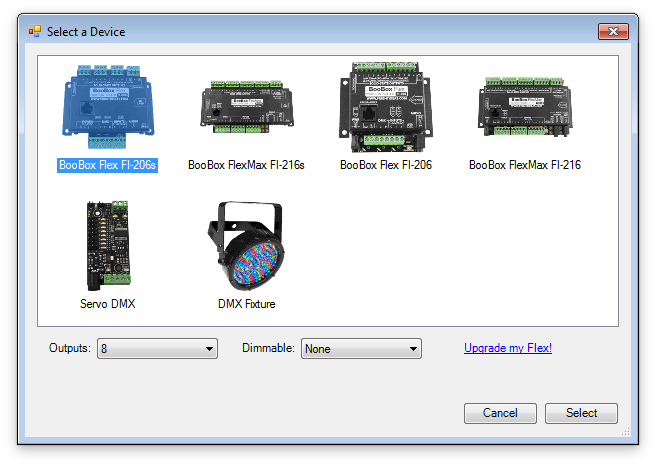
Select your Slave Controller
This can be any Flex or FlexMax with DMX terminals. Below we are using a Flex 206s with 8 outputs.
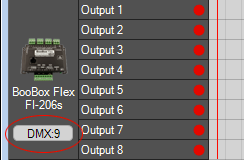
Note the DMX Address: Director will assign the next available DMX address to this slave. The assigned address is always shown below the device's image. Write this address down as we'll need it in a few minutes. In our example Director has assigned address 9.
Repeat for Each Slave
Repeat the above three steps for each slave, each time noting the assigned address. Save the show when you're done.
Create your Slave Show
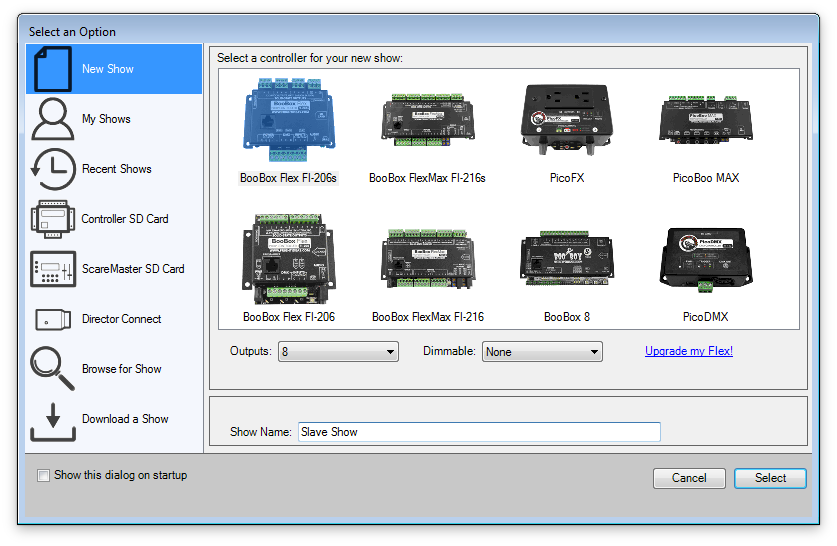
Now we have to create a separate slave show for each Slave device. Click the Open button, select New Show, then select your Slave device.
Set Slave Mode and Address
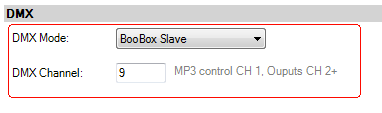
Now the most important step is to select the Show Settings tab under the Settings gear icon. Scroll towards the bottom and you'll see the DMX Mode. Set it to BooBox Slave and enter the address Director assigned to this slave device in the master show.
Add Any Sounds
If you also want this BooBox to play sounds now is the time to load them. Click the Sound button and select your sound file. Repeat for each scene you have a sound for.
These sounds will be played when the master BooBox plays the scene. Each time the master starts a scene it broadcasts a scene start command on DMX channel 1, the slave BooBoxes listen for those commands so they know which sound file to play.
Export the Slave Show
The slave show must now be exported to the slave BooBox. Even if there are no sounds the show must be exported in order to set the slave mode and address. Loading the show into internal memory is preferred.
If you have too many sounds loaded you may have to export to an SD card which is fine too. But remember never to remove the SD card when the controller is powered on. If you do it will load whichever show is on the internal memory which may have it set to be a DMX Master. You can never have two DMX Masters on the same DMX network so make sure it's powered down if the SD card is removed.

Repeat for Each Slave
Repeat the above four steps for each slave. Once you've exported a slave show to each slave you can re-open your master show and program them all in unison. All the animation will be stored on the master controller.
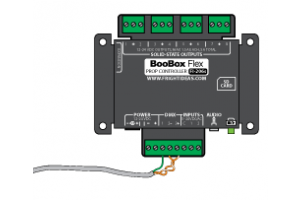
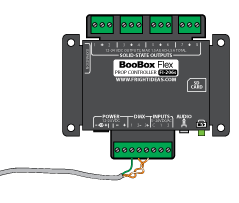
Wire It Up
Once the slaves have been set into slave mode you can safely wire them together using the three DMX pins. Pins 2 & 3 must be connected with a twisted pair. CAT5 cable is a convenient source for this type of wire. We usually twist the two conductors in the green pair together so they essentially become one thicker wire and put that into pin 1. Take two conductors from another pair, put one into pin 2 and the other into pin 3.